This guide shows you how to set up the free SEMRS theme, one step at a time. You can change everything with clicks. You never need to touch code.
Where the SEMRS theme settings are
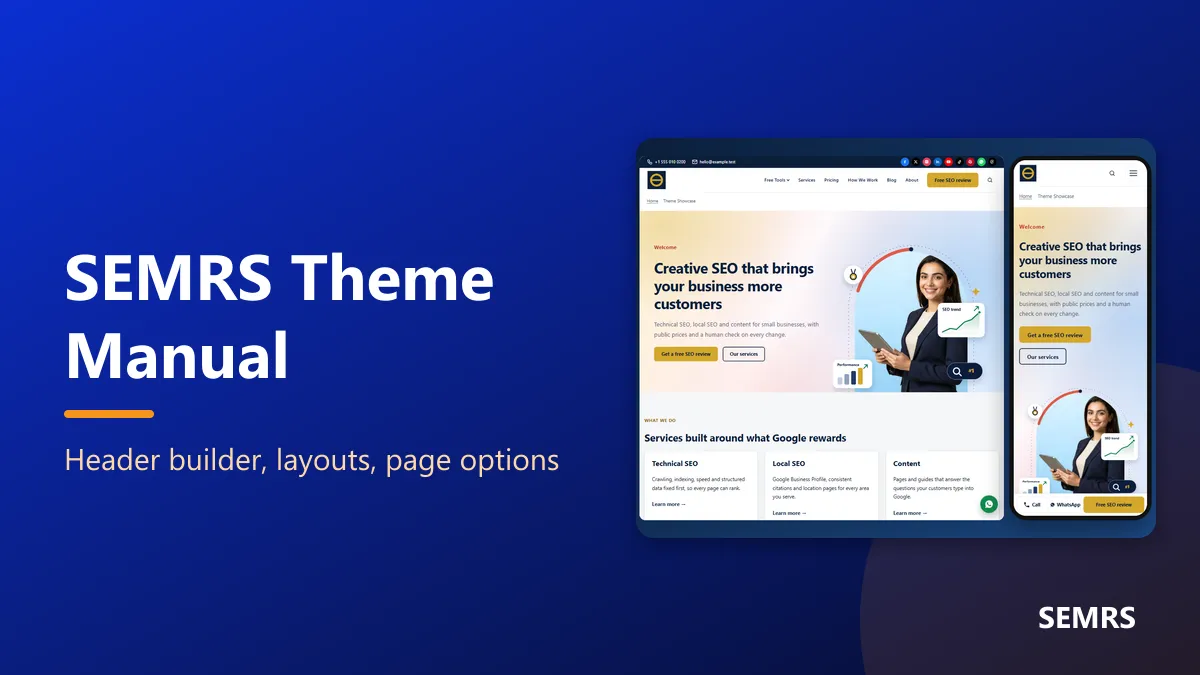
All settings are in one place: Appearance → Customize → SEMRS Theme. You see a live preview while you work. Nothing changes on your real site until you click Publish.
1. Add your logo
- Go to Customize → Site Identity and click Select logo.
- Pick your logo. A square logo of 512 × 512 pixels works best. A wide logo should be at least 320 pixels wide.
- Open Logo & header button in the same panel. Set the logo size for computers and for phones.
Tip: use a PNG or WebP file. They stay sharp and load fast.
2. Build your header
Go to SEMRS Theme → Header builder. Your header has three rows. Each row has three zones: left, center and right.
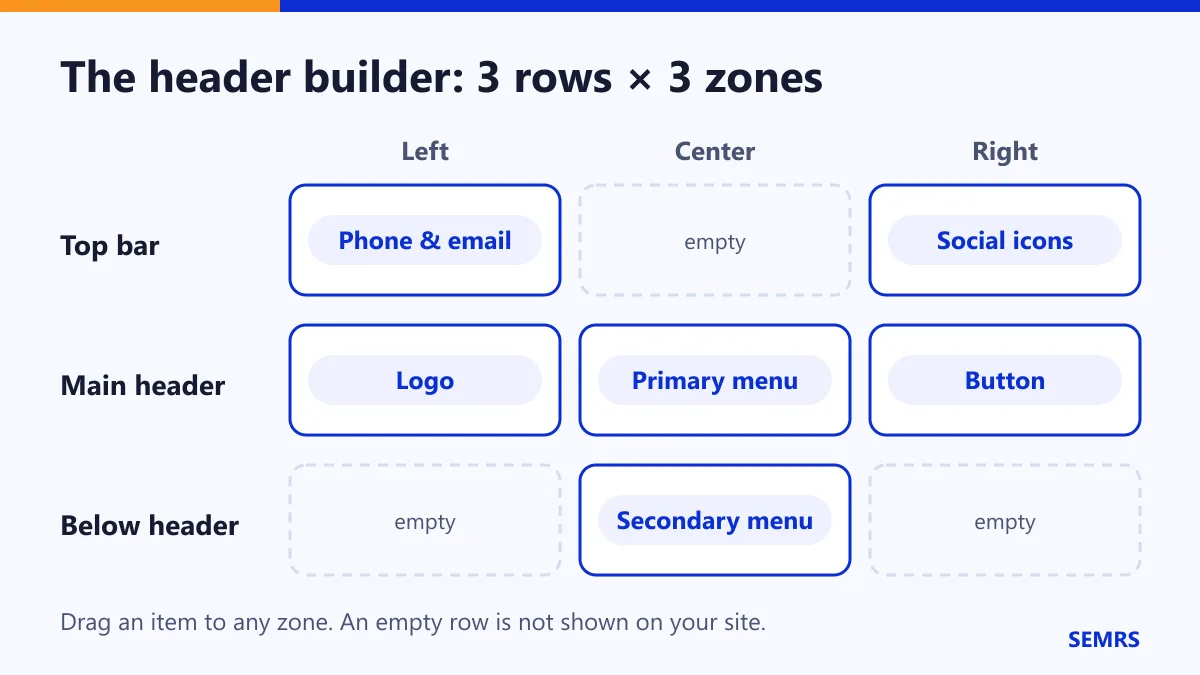
- Drag an item to the zone you want.
- Click + Add element to add an item to a zone.
- Click × to take an item away.
- A row with nothing in it is not shown at all.
| Item | What it shows |
|---|---|
| Logo | Your logo, or your site name if you have no logo |
| Primary menu | Your main menu. On phones it opens as a full panel. |
| Secondary menu | A few small links, good for the top bar |
| Button | A call-to-action button, such as “Get a quote” |
| Search | A search icon that opens a search box |
| Social icons | Links to your social profiles |
| Phone & email | Tap-to-call and tap-to-email links |
| Text | A short note, such as your opening hours |
You can also make the header sticky (it stays at the top when people scroll) or transparent (it sits over your first image).
On phones the header shows the logo, the search icon and the menu icon. Turn on Show the top bar on phones if you want your phone number there too.
3. Set up the footer
In the same panel, open Footer builder. Here you choose what goes in the bottom bar: copyright, social icons, a footer menu, phone and email, or a short text.
To add columns of widgets above it, go to Footer, choose 1 to 4 columns, then fill them in Appearance → Widgets.
Tip: type {year} in the copyright text. It always shows the current year.
4. Pick colors, fonts and layout
- Colors: choose your main color, accent color, text color and link color. The default colors are easy to read. If you change them, make sure the text still stands out.
- Fonts: system fonts load fastest. You can also use the Inter font.
- Layout: choose a sidebar on the right, on the left, or no sidebar.
5. Blog features (all free)
In the same panel, open Blog & posts. You can switch on:
- a featured image at the top of each post
- links to the next and previous post
- a reading progress bar
- an “Updated on” date
- an author box and related posts
The author box uses the name, photo and bio from Users → Profile.
6. Change one page only
Open a page in the editor. In the sidebar, find Page options. These settings change only that page.
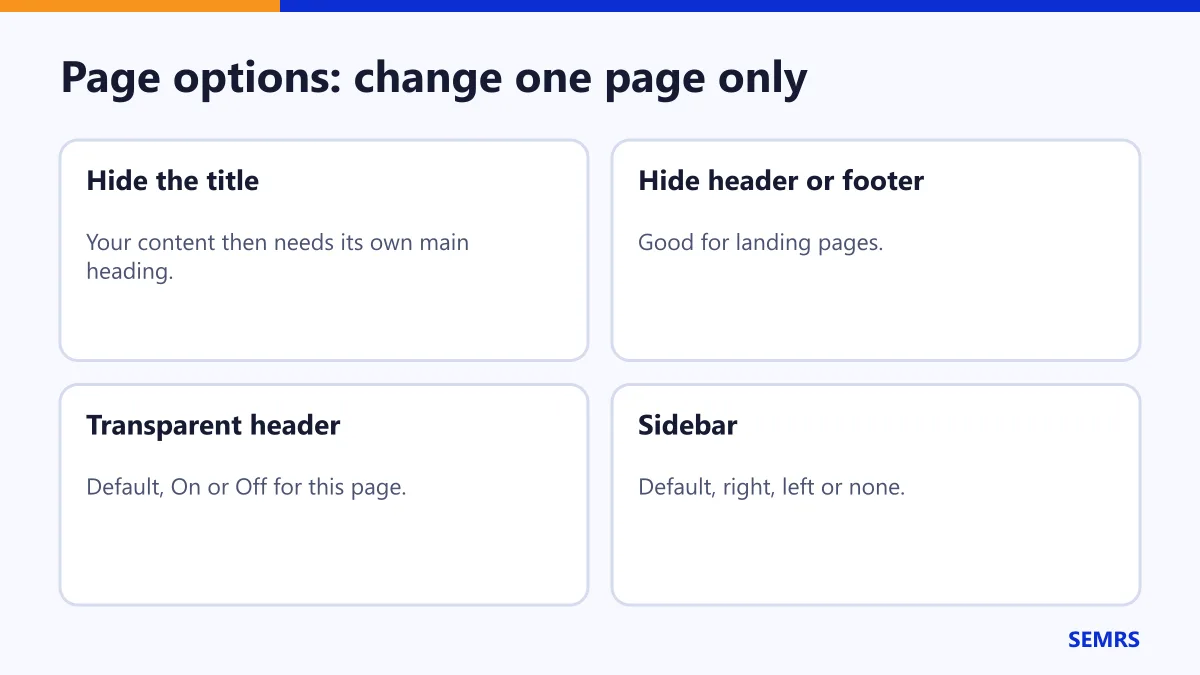
Want a page with no header or footer at all? Choose the Blank canvas template. For landing pages, choose Full width.
7. Add ready-made sections
In the editor, click + and open Patterns → SEMRS sections. You will find a hero, services, steps, pricing, questions and a call to action. Click one to add it. Then type your own words.
Remember: prices in patterns are only examples. Change them to your real prices.
8. The child theme
SEMRS Child SEO adds a Call and WhatsApp bar on phones. Set your numbers in SEMRS Theme → Contact & conversion. Put any custom CSS in the child theme. Then theme updates never remove it.
SEMRS theme help and next steps
This theme follows the WordPress.org theme handbook, so normal WordPress menus and widgets work as usual. Next, add page sections with SEMRS Blocks or import a full site from the templates guide. Still stuck? Contact us.