This guide shows you how to set up SEMRS ads on your site. The ads manager is part of the free SEMRS Core plugin. It puts your ads in safe places. It also keeps ads off pages where they break Google’s rules or scare away customers.

1. Switch on SEMRS ads
- Go to SEMRS → Features and switch on Ads Manager.
- Open SEMRS → Ads.
- Paste your AdSense publisher ID. It starts with
ca-pub-. - Choose where ads should show (see the next step).
- Switch on Enable ads and click Save.
Tip: switch on Manage ads.txt and paste the lines your ad network gives you. Then open yoursite.com/ads.txt to check it works.
2. Choose where ads go
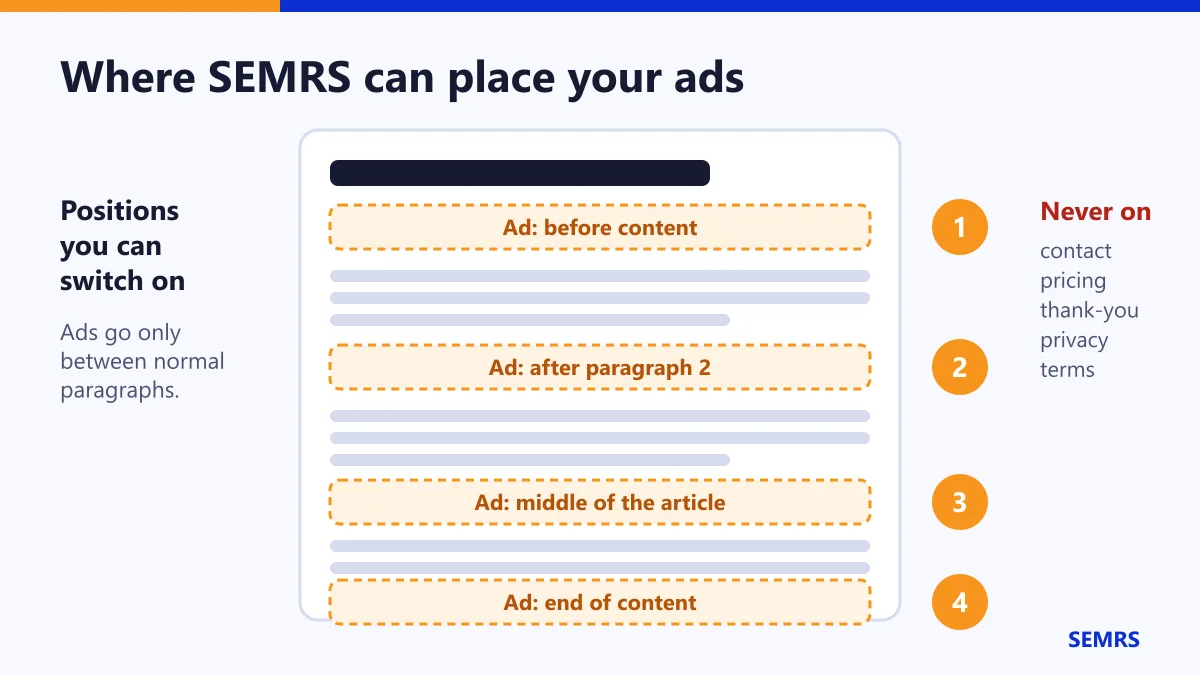
| Position | Where it shows |
|---|---|
| Before content | Under the post title |
| After paragraph | After the paragraph number you pick |
| Middle | Halfway down long articles |
| End | After the article |
| Shortcode | Anywhere you type |
Ads go only between normal paragraphs. They never go inside tables, lists or headings. Short posts (under 300 words) get no in-content ads.
3. Safety is built in
- No ads on important pages. Contact, pricing, services, thank-you, privacy and terms pages stay ad-free. So do your home page and search results.
- Turn ads off on one post with the SEMRS Ads box in the editor.
- Every ad is labeled “Advertisement”.
- No jumping pages. Space is saved for each ad, so the text does not move.
- You don’t see your own ads when you are logged in. This stops you clicking them by mistake.
4. Follow the AdSense rules
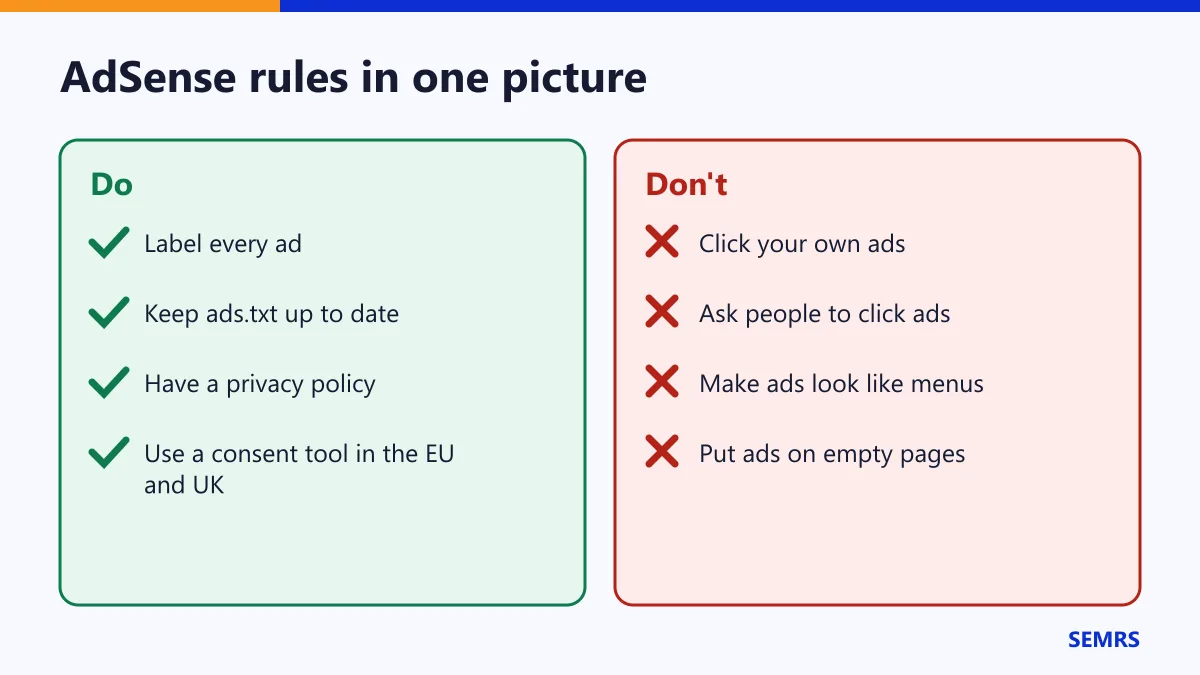
Google’s AdSense Program policies apply to every site. The main rules are simple:
- Never click your own ads. Never ask anyone else to click them.
- Do not make ads look like menus or buttons.
- Do not put ads on empty pages, error pages or login pages.
- Your content must follow the Google Publisher Policies.
- Have a privacy policy. Use a Google-certified consent tool for visitors in Europe and the UK.
SEMRS follows these rules by default. You are still responsible for your own content.
5. Other ad networks
Choose Custom code for a position. Then paste the ad code from Google Ad Manager or your network. Put any header script in Head code. Add each network’s lines to ads.txt.
6. Extra ad features in SEMRS Pro
- More places: repeat an ad every few paragraphs, or show ads between posts on blog pages.
- Targeting: show an ad only in some categories, only on older posts, or only between two dates.
- A/B test: show two ad versions at random. Keep the one that earns more.
- Click protection: if someone clicks ads 3 times in a day, they see no ads for 7 days. This protects your AdSense account.
- Ad-blocker note: a small, polite message. It never hides your content.
SEMRS Pro never refreshes ads and never puts ads in popups. This keeps you within the AdSense rules.
SEMRS ads help and next steps
Ads can slow pages down, so test your pages with the speed guide after you add them. Read the full policies guide too. Questions? Contact us.